")


Introduction

Making a book
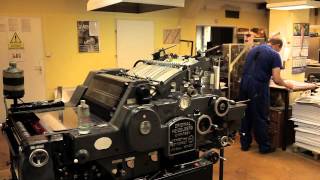
Teatr Grodzki, established in 1999, is a non-profit organization in the region of southern Poland with a complex and wide artistic and educational program to combat social exclusion. It offers arts workshops (theatre, puppetry, computer animation and fine arts) and training programs (drama education and social economy) for instructors, teachers, therapists, artists, volunteers and workers of non-governmental organizations, as well as vocational training programs for socially excluded groups.
In the year 2004, the Bielsko Artistic Association Grodzki Theatre created the Printing and Bookbinding Works, which is an occupational workshop that activates persons with various disabilities.
The Works are fully adjusted to the needs of the disabled who work there, and at the same time, focused on activation and social rehabilitation of workers. The goal of the Works, just like any company, is revenue and profit, which depends on the productivity of labor, and thus, also from the process of social rehabilitation of their workers.
The Printing and Bookbinding Works of the Bielsko Artistic Association Grodzki Theatre employs 40 people with disabilities and 16 staff members who assist in service and rehabilitation. Among the disabled there are persons who are blind and visually impaired, mentally ill, whose mobility is reduced or who are significantly disabled for other reasons.
The Works are the only ones in Bielsko-Biala, and one of the six in the Region of Silesia.
The target group:
- the employees of the Bookbinding and Printing Works, including ones with disabilities and various learning difficulties, 18+
The trainee will be able to:
- independently make and bind a book (to allow for bleed)
- learn a particular craft
- acquire niche skills
- improve fine motor skills
- become more independent
Task

One of the initial stages of making a book - stacking and gluing
What is he doing?
An employee of the Bookbinding and Printing Works (an occupational workshop), who is sitting at a well-lit table, is putting a thick layer of bookbinding glue on the spine of stacked sheets of paper. It is one of the initial stages of making a book.
Why is he doing it?
Making and binding books ordered by institutions and individual customers (also binding that allows for bleed) is one of the major tasks in the Bookbinding and Printing Works, although it's not the only one. This is the task with which each employee of the Works begins his/her vocational activation.
What are the benefits for an employee of an occupational workshop?
Making and binding a book, employees of an occupational workshop with various learning difficulties learn a particular craft and acquire niche skills. They develop their independence and improve fine motor skills. In consequence, they will be able to make and bind books (including binding to allow for bleed) in a skilled manner, without an instructor's assistance. It gives them greater self-confidence, autonomy and self-reliance. They are able to use the newly acquired skills in the Bookbinding and Printing Works.
Process

Gluing backing material to the spine of the book
I. PREPARATION
You will need a big, smooth, well-lit table.
Prepare:
- a tray for bookbinding glue
- a ruler
- an eraser
- a pencil
- bookbinding glue
- glue brushes (various sizes)
- a knife
- scissors
- a needle and thread (stitching twine is the best)
Also prepare:
- paper strips the length of the book, 1.5-2 cms in width
- thicker white endpaper (the height of a book and the double width of a book) - the endpaper is to be folded in half
- brown paper liner
- cardboard sheets
- backing material
- colorful paper for the cover
- sheets of paper for the book
Make sure that you can access a press.
If you don't have a press, you can use ballast weights (e.g. chipboard or thick acrylic sheets).
Make sure that you can access a paper driller.
If you don't have a paper driller, you can use a punch tool and a hammer.
Make sure that you can access a squaring shear (guillotine).
If you don't have a squaring shear, you can use a knife.
II. STACKING
- Prepare an appropriate number of sheets of paper (e.g. 20)
- Stack the sheets (put them evenly)
- Place ballast weights on the stacked sheets
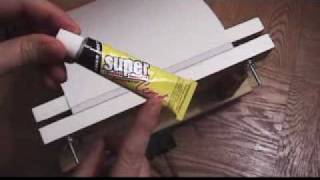
III. GLUING
- Dip a brush in the bookbinding glue
- Put a thick layer of glue on the spine of the stacked sheets
- Leave to dry (preferably till the next day)
- Remove the ballast weights
IV. MARKING HOLES
- Take a pencil and a ruler
- Place the ruler along the spine, about 1.5 cms from the spine
- Make pencil marks in the places where you will drill holes
- The marks should be placed about 2.5 cms from the sides, and there should be 4 cms in between them
V. DRILLING HOLES
- Place the brochure in the paper driller, with the spine forwards - towards the drill
- Place the first marked point under the drill
- Drill a hole
- Repeat for all the remaining marked points
VI. STITCHING
- Carefully remove the brochure from the paper driller
- Thread the needle
- Begin stitching at the back and at the bottom of the brochure
- Stitch, passing the stitching twine alternatively through the holes
VII. FINISHING STITCHING
- When you finish stitching, tighten the stitches extra tight
- Knot the twine, leaving about 0.5 cms of excess
- Cut off the remaining twine with scissors
- Bury the knot and the excess twine in the hole at the back and bottom of the brochure
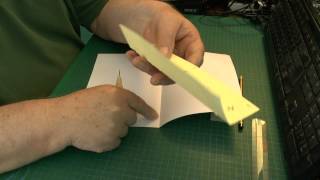
VIII. GLUING THE PAPER STRIP
- Take the prepared paper strip the length of the book, 1.5-2 cms in width
- Put a layer of glue near the spine of the book, so that it covers the stitches
- Place the paper strip on the glue, so that it covers the stitches and goes beyond the spine by 1-1.5 cms
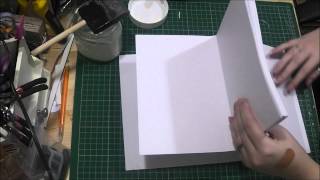
IX. GLUING ENDPAPER
- Put a layer of glue on the part of the strip glued to the book
- Place the endpaper on the glue, so that its rim is even with the spine, and press it tight
- Put a layer of glue on the part of the strip that goes beyond the spine, and glue that part to the endpaper
Congratulations!
You have made a book that can now be bound!
Now we will tell you how to bind it to allow for bleed.
X. GLUING BROWN PAPER AROUND THE SPINE
- Take a tray and fill it in with bookbinding glue
- Roll the roller in the tray and then roll it out on the textured surface of the tray to remove excess glue
- Put an even layer of glue on the brown paper strip
- Glue the brown paper strip tightly and evenly around the spine of the book
XI. GLUING CARDBOARD SHEETS
- Prepare 2 sheets of cardboard, narrower than the book by about 1 cm
- Put a layer of glue on the endpaper
- Carefully glue one cardboard sheet to the endpaper, 1 cm away from the spine of the book
- Turn the book around and repeat the procedure
XII. GLUING THE BOOK TOGETHER
- After gluing the cardboard sheets, place the book (or a couple of books) in the press
- Apply firm pressure
- Wait for no less than 20 minutes
- Remove the book from the press
XIII. GLUING BACKING MATERIAL
- Take the backing material
- Put a layer of glue on the inner part of the backing material
- Carefully glue the backing material around the spine of the book
XIV. GLUING COLORED PAPER TO THE BOOK COVERS
- Take colored paper
- Carefully glue the paper to the cardboard sheet, about 1 cm away from the spine
- Turn the book around and repeat the procedure
- Place the book in the press
- Apply light pressure and wait until dry (for a minimum of 20 minutes)
XV. CROPPING THE BOOK
- Carefully place the book in the squaring shear (guillotine)
- Readjust the position of the book
- Remove your hands!
- Crop the book/recut the edges
XVI. PASTING THE LABEL
- Put a layer of glue on the blank side of the label
- Paste the label evenly to the front cover of the book
CONGRATULATIONS!
YOUR BOOK IS READY AND BOUND AND THE LABEL IS PASTED TO IT!